Pages

Thursday, April 29, 2010

Off the Runway: Le Pop

Here is another post off my old blog AllTheGlitters that still inspires me. I came across it today and just had to repost it. I still feel the need to do these looks myself because they are so beautiful and with florals in season now in 2010, it would be a great complement to complete a fabulous romantic, modern look.

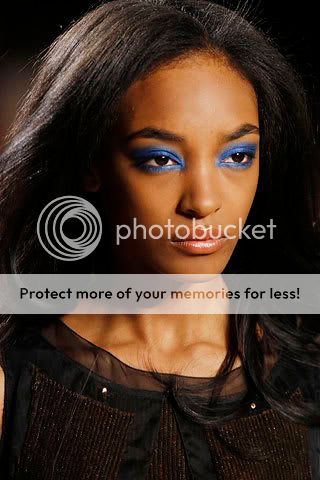
We love to watch girls on the runway strut the latest fashions, but do we ever pay attention to those small details, the shoes, the bag, the nails... THE MAKEUP? Well I'm sure many of you have taken notice to the Spring/Fall 2008 runway makeup looks because they just POP. Andy Warhol, pop art legend has inspired the makeup looks for this year with bold colorful eyes that make a huge statement. Hopefully all of you will embrace this trend, even those of you who are afraid of such boldness. If your not into such a bold eye, tone it down a little and pick a color that is subtle but still makes the eye the main focus of your face. Still not feeling it? Try taking the color to other features of your face such as your lashes, cheeks or the ever so popular lips. Urban Decay just came out with some sweet "Big Fatty" Mascaras that would look so beautiful on and MAC Pro blushes in bright bold colors such as Full Fuchsia and Devil would be stunning.
Get the Look:
  • Urban Decay Peace Eyeshadow OR
  • MAC Electric Eel Eyeshadow
The Look for Less:
  • Loreal HIP Showy Eyeshadow duo
Get the Look:
  • MAC Bitter or Yellow Chrome Eyeshadow
The Look For Less:
  • NYX Chick Eyeshadow OR
  • Pure Luxe Sunny Side Up Eyeshadow

Get the Look:
  • Urban Decay Electric Blue Big Fatty Mascara
The Look For Less:
  • Milani Hot Blue Mascara

Get The Look:
  • Urban Decay Ransom Deluxe Eyeshadow OR
  • MAC Violetta Lipstick (used on eyes)
The Look for Less:
  • NYX Purple Eyeshadow (Applied Wet)
Get The Look:
  • MAC Orange Eyeshadow
  • MAC Black Track Fluid Line
The Look For Less:
  • NYX Orange or Hot Orange Eyeshadow
  • CoverGirl Very Black Line Exact

Tuesday, April 27, 2010

Product Review Montagne Jeunesse Crystal Masque

My boyfriend and I like to wander the super market from time to time and pick up products that inspire us to make new and exiting dishes. On one recent trip I tip toed over to the beauty section. I try and avoid going to this sections if I can because I end up buying almost always if I do. This time I gave myself my best excuse that "I need face wash." I could have really done without, but I really wanted something new, something I could depend on to make me feel fresh and really clean, something I could apply and feel luxurious about. I found Montagne Jeunesse Crystal Masque and it was exactly what I was looking for.
Pro's
  • Smells of cotton candy and honey
  • Exfoliates skin
  • Leaves skin feeling soft and conditioned
  • Gives skin a glow
  • Deep Cleans
  • Price
Con's
  • Packaging is not re-sealable
  • Sticky texture
Product: 5 out of 5
Packaging: 4 out of 5
Quality: 5 out of 5
Price: $1.08
Where I bought it: HEB Supermarket
Would I purchase again? Yes

Overall: I'm head over heels for this product and I cant wait to buy more of them. It didn't look the way it did on the packaging (like pink icing), it was just a clear pink gel with sugar granules. The smell is amazing! It reminds me of a carnival. It smells like cotton candy and honey. It's irresistible, I want to leave it on all day! I heated the product up as the instructions said and then applied to my face for 15 minuets. After I washed it off my face felt baby smooth, cleaner and healthy. I recommend this product to everyone! I also bought the Face Tonic Mask but I have yet to try it, more on this one later!

I wonder, does anyone know of a perfume that smells like this mask? I want one! I also want these silk black striped pajama pants from Victoria Secret. They were worn by Jennifer Lopez in the movie The Backup Plan. Anyone know where I could purchase them? They don't have them on their site anymore. I hope I can find them, or something similar.


Tuesday, April 20, 2010

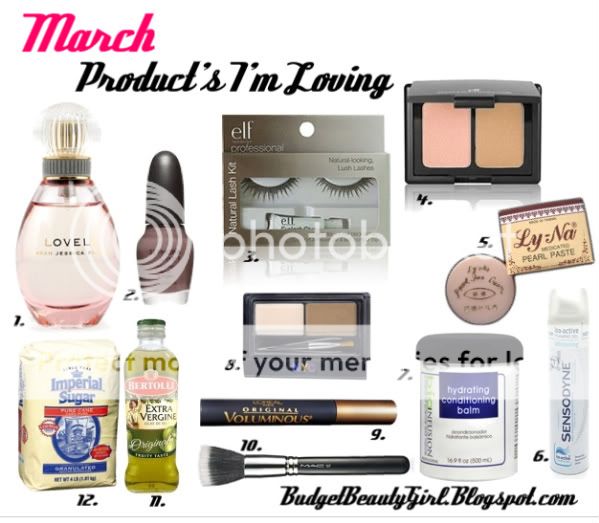
Products I'm Loving: March

  1. Lovely by Sarah Jessica Parker Perfume: I was addicted to this perfume this month. It smells of lavender, orchids, and a hint of musk. I picked up this perfume at Ulta because it reminded me of the smell in my mothers flower shop. It really does smell Lovely!
  2. OPI for Sephora Nail Polish in Metro Chic: I finally got my hands of this nail polish after ordering this online at Sephora. I took it with me to get my nails done at the salon and I got so many complements. It's a must have.
  3. ELF Professional Eye Lashes: March was full of parties and weddings so I bought about ten of the natural and dramatic lash kits. I wanted my lashes to look full yet natural, these babies did the trick. I didn't use the glue it came with though... I opted for my favorite glue Duo which dries clear.
  4. ELF Blush/Bronzer Duo: I can't get enough of this product, I am super addicted. I bought a back up for myself and bought another to put in my bff's basket on easter.
  5. Ly-Na Pearl Cream: I finally found this cream at one the local beauty supply stores here in my town. I love the herbal scent! This medicated pearl cream is amazing, it dramatically cleared up my skin and reduced scaring. I recommend this product to everyone, even if you don't have acne, but are looking for a product that will give your face a glow!
  6. Sensodyne Whitening Tooth Paste Foaming Gel: My new favorite tooth paste! My little brother recommended it to me because he likes fancy things... foaming tooth paste cool!? Im in! I have pretty sensitive teeth so this product was perfect for me and I see my teeth getting whiter too! yay!
  7. Bioinfusion Hydrating Conditioning Balm: Realizing that my hair needed extra care, I picked up this product at wallgreens. It made my hair smooth, shiny and mended my split ends. I still need to add more products to my hair care routine, but this was the perfect product to start with.
  8. NYC Brow Kit: My holy grail brow kit. This product is so inexpensive and so great. I use an angled brush to fill in my brows and use the wax so that the hairs stay put! Tweezers that come with the kit are super tiny and grip my strays to give me a perfect polished arch.
  9. Loreal Voluminous Mascara in Black: I can see what all of the fuss is about after using this product. This product my make my lashes fuller and adds volume.
  10. MAC 187SE Duo Fiber Brush: I've been using this brush for months now and I still cant put it down. I use it to stipple on my foundation, lightly apply my blush and add a touch of highlight to my cheek bones and nose.
  11. Extra Virgin Olive Oil: I combine this product with sugar and honey to exfoliate my face and lips. It does the trick to remove the most nasty dead skin and relives dry areas. My face and lips feel moisturized and hydrated.
  12. Sugar: Combine with olive oil and honey to exfoliate! An inexpensive DIY Scrub!
Watch this informative video by Michelle Phan to get the low down on how to create the sugar scrub for your face. It's what go me started!

Wednesday, April 14, 2010

Happy Belated Easter!

Im late, I know... but better late than never, Happy Belated Easter! I just uploaded my easter pictures from my camera that I completely forgot about! Hope you all had a wonderful Easter! Corny picture of my boyfriend and I ... so in love! I had colorful confetti in my hair and the sun was so bright and nice! My mother had the gardener come in and plant spring flowers, she also decked out all our trees with lanterns, giant eggs and rainbow windmills. Our family had a easter egg hunt with lotto tickets, candy and money in the eggs. As you can imagine... everyone went crazy... I was like, "makeup money, makeup money!"

In other news, I also got a Revlon nail polish that same week for $1.88 at my local grocery store HEB. Those of you who live in Texas and have an HEB in your town then head on over if your interested in saving $2.00 off any Revlon product! The sale is is still going on right now.
All you need is a yellow coupon that is taped to dozens of revlon products. If you don't see the coupon then ask customer service for one! I might go back for the rest of my Revlon shopping list tonight! I really want Revlon Nail polish in minted, plum seduction, and electric pink!


Sunday, April 11, 2010

Review: E.L.F. Concealer's

Lately I have been on a E.L.F craze. I really adore this brand and every time I walk into Target I can't leave without buying one of their products. I also follow their Twitter AskELF, so as soon as I see 50% off I almost always order something. Addicted much, yeah maybe but all their products are so inexpensive that I cant help myself.

So far I have tried three out of the seven concealers that E.L.F offers. The following is my review on:
  1. Elf - All Over Cover Stick
  2. Elf Studio - Under Eye Concealer and Highlighter
  3. Elf Studio - Concealer
These reviews are based on my opinion and I am not affiliated with E.L.F in any way. Hope you all enjoy!

ELF All Over Cover Stick (Apricot Beige - Fair)

Product: 4 out of 5
Packaging: 3 out of 5
Quality: 4 out of 5
Overall: 4 out of 5
Price: $1.00
Where I bought it: HEB supermarket
Would I buy again? Yes


Pro's:
  • Full coverage
  • Easy to apply (Creamy)
  • Long lasting
  • Contains lots of product
  • Great for combination/dry skin types
  • Great range of colors (7 shades)
Con's:
  • Strong smell of orange
  • Can get greasy over time
  • Packaging rotation device failed
Overall: It states that this product is for all over the skin, but I used is solely as a concealer because I have sensitive combination skin. It worked great for this purpose. It covered imperfections and dark circles very well and it had a creamy texture that was surprisingly long lasting. I applied this product after my foundation and set it with translucent power. I would not recommend this to anyone with oily skin because it is greasy. I would also encourage people sensitive to strong odors to beware, it smells strongly of orange. I did not mind the smell, but I know others would. I used a concealer brush to extract the product because the rotation device failed. Im looking into buying this product again in different shades so I can experiment contouring. Hopefully it works well.

ELF Studio Under Eye Concealer and Highlighter (glow/fair)

Product: 3 out of 5
Packaging: 5 out of 5
Quality: 3 out of 5
Overall: 4 out of 5
Price: $3.00 ( I got mine 50% off thus, $1.50)
Where I bought it: eyeslipsface.com
Would I buy again? No


Pro's
  • Highlighter side has a pink doe shaped applicator
  • Highlighter works very well
  • Evens out skin tone and redness around eyes
  • Good for people with dry, clear skin
Con's
  • Light/Sheer coverage
  • Has shimmer on concealer side
  • very liquid consistency
  • will not hide blemishes
  • Color range is limited to 3 shades.
Overall: I have mixed feelings about this under eye concealer. I like the packaging a lot because its convenient, two products in one. I don't like the concealer side. I personally like a thicker consistency for concealers, this product is very sheer and just evens out the skin tone. I don't have circles around my eyes, but I feel like if I did, it would not cover them. Also the concealer is shimmery, and I feel like that attracts attention to imperfections. Yikes! I really love the highlighter side though, especially on the bridge of my nose. I would buy this product again only for that lovely highlighter.

Elf Studio Concealer (Ivory)

Product: 4 out of 5
Packaging: 4 out of 5
Quality: 4 out of 5
Overall: 4 out of 5
Price: 3.00 ( I got mine 50% off thus, $1.50)
Where I bought it: eyeslipsface.com
Whould I buy it again: Yes


Pro's:
  • Sleek black packaging
  • Medium build-able coverage
  • Non greasy
  • Great for combination/oily skin types
  • Silky texture
  • Matte finish
Con's:
  • Limited color range (3 shades)
  • Product wasn't attached to rotation device.
  • Small amount of product.
Overall: Out of the three concealers that I tried, I liked this one the most. It has a coverage comparable to the all over cover stick, but it's not greasy. It has a matte finish which I loved. It covered imperfections very well, even my pesky blemishes. I wish that this product was packaged more carefully because the concealer came right out of the rotation device and I also wish there would be more shades! I think I need at least one shade lighter than the lightest color Ivory. Will definitely buy again!

Tuesday, April 6, 2010

DIY: Makeup Cart Organizer Tutorial

Here is an old post from my old blog AllTheGlitters. I decided to repost it because I found the tutorial so useful and it was a very popular post. I will be reposting tutorials and other favorite post entries in the future... stay tuned.

A couple of months back I saw Califjewls makeup collection and organizer on Youtube and from that moment on I was determined to organize my makeup as perfectly as she did. It took many months but I finally found a cart similar to hers. I made this tutorial for anyone who would like to organize their makeup the same way. Since setting up my cart, I've noticed that it saves me a tremendous amount of time. Hope you all enjoy this tutorial and have fun getting organized!

What you will Need:
1. Scissors and Flexible Measuring Tape

2. Easy Foam Liner (any color... I got mine in Black)

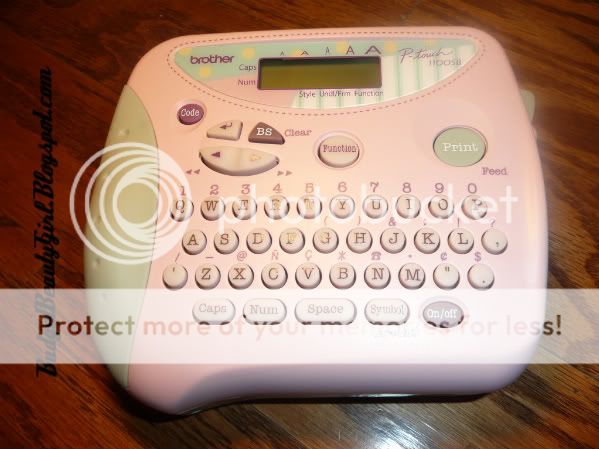
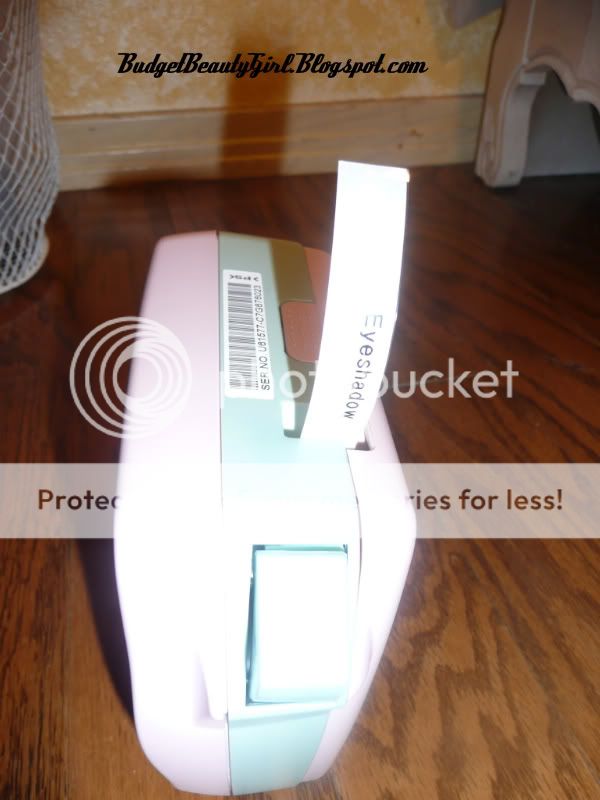
3. Label Maker


4. Mobile Cart Organizer ( Office Depot 29.99 plus tax)

5. Hammer
6. White Pencil for marking measurements.

Let's begin with the tutorial!

Step 1: Remove stickers and lay cart down.
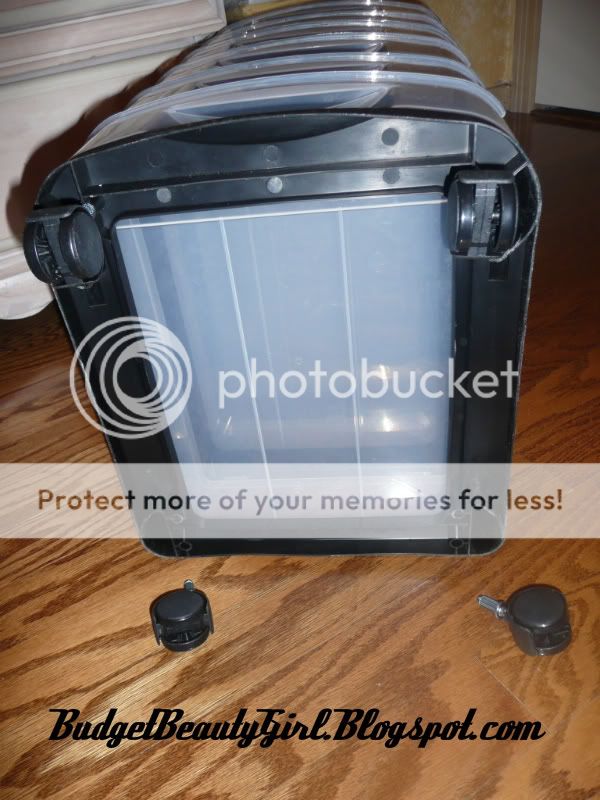
Step 2: Insert the 4 rollers provided into the 4 slots. These are located at the bottom of your cart. Use a hammer to lightly tap them into place correctly.

Step 3: Sit your cart upright to make sure that it is leveled and that the rollers roll with ease.


Step 4: Take out one drawer to measure for foam mat. (Mine measured 14 x 9.5)

Step 5: Lay out your foam liner and mark it with a white pencil according to your measurements.

Step 6: Cut the foam liner in the measurements taken. Use the lines on the foam as a guide to help make a straight cut. Repeat steps 4-6 until you have a sheet for each of your drawers.

Step 7: Insert sheets of foam into each of your drawers.

Step 8: Place drawers back into their slots and begin to organize your makeup into each drawer. Example: I used the first drawer of my cart for eyeshadows.

Step 9: After you have figured out a place for all of your makeup products, label each drawer! I used a label maker with clear tape to make my labels.


Step 10: Done!

Now if you bought a cart with compartments on top like Califjewls and I then follow the next set of steps to further organize additional products.


Step 1: Measure each compartment.
Step 2: Mark foam with a white pencil and cut left over foam scraps to fit each compartment.

Step 3: Place all foam pieces into corresponding compartments.

Step 4: Organize any additional products as you see fit. Example: I put hand sanitizer, brush shampoo, sharpeners, primers, paint pots, moisturizer and chap-sticks. I also placed a pencil box filled with brushes on top.

Done! Hope everyone enjoys their newly organized makeup!